Getting Started
Welcome to the A+ Grass asset! This documentation will help you get started quickly and efficiently.
You can import the A+ Grass asset into your Unity project by downloading it from the Unity Asset Store or from the Package Manager directly in your project.
Video Tutorial
Quick Setup
You can use one of the examples provided to get started quickly. To get the grass up and running in your project, simply drag and drop the prefab into your scene, add Grass Manager into an empty game object, and hit play.
You can find the prefabs in the folder A+ Grass > Prefabs > Grass Patch
To add interactive behaviour to the grass, you need to additionally input the Grass Interactor onto any object you want interactive behaviour from. But Let's cover the setup in depth and without the use of the examples. Starting with the Mesh & Shader setup.
Project Settings
You can use one of the examples provided to get started quickly. To get the grass up and running in your project, simply drag and drop the prefab into your scene, add Grass Manager into an empty game object, and hit play.
You can find the prefabs in the folder A+ Grass > Prefabs > Grass Patch
To add interactive behaviour to the grass, you need to additionally input the Grass Interactor onto any object you want interactive behaviour from. But Let's cover the setup in depth and without the use of the examples. Starting with the Mesh & Shader setup.
Grass Patch Model
Start by adding a mesh into your scene that you can use the grass shader on. Make your own, or use the provided template located in folder A+ Grass > Models > Grass Patch
Level of Detail (LOD)
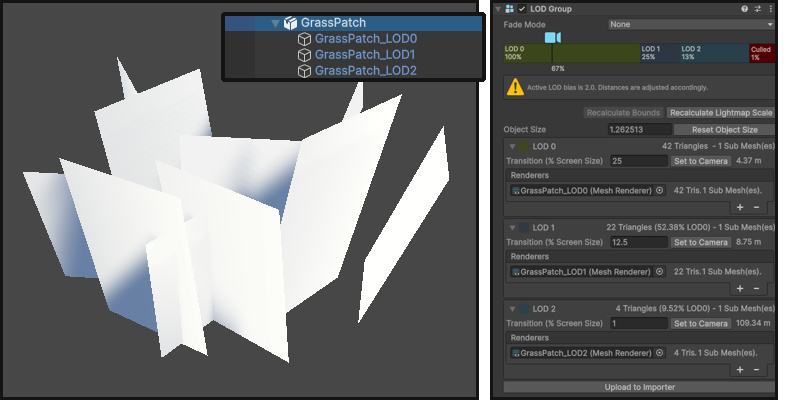
The template has a Level of Detail (LOD) component included for optimizing performance based on the distance from the camera. There are 3 levels/variants of the model, reducing amount of faces with each. Remove or adjust the LOD depending on your project's needs.
Render Face
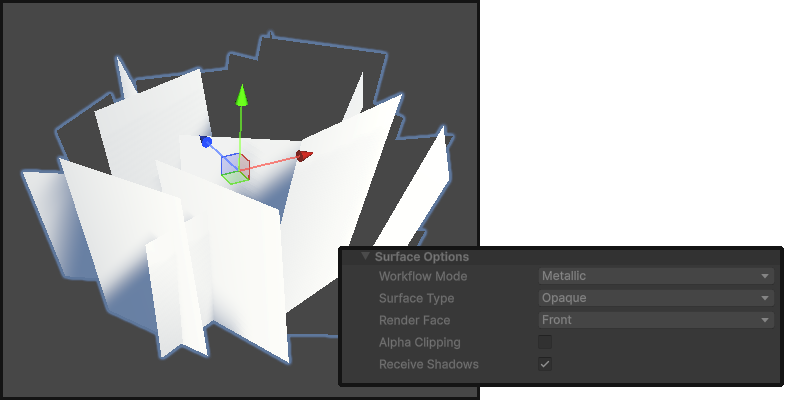
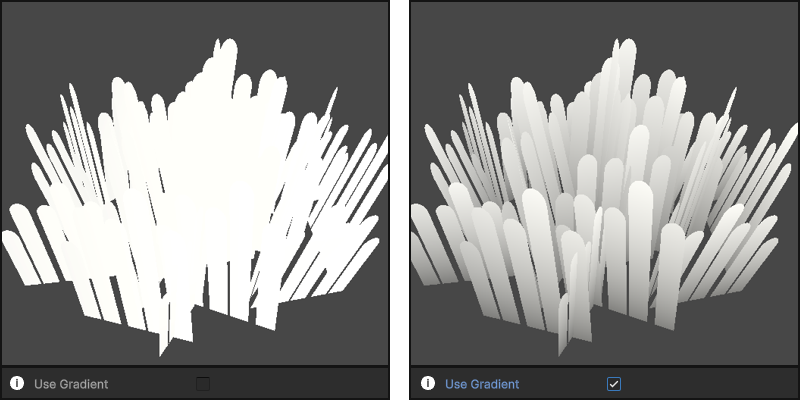
What you can notice is that by default the material's Render Face is set to Front. This means that not all of the faces of this model will be visible from each angle.

The A+ Grass shader will enable it to Both by default, but you can change it if needed.
Shadows / Performance
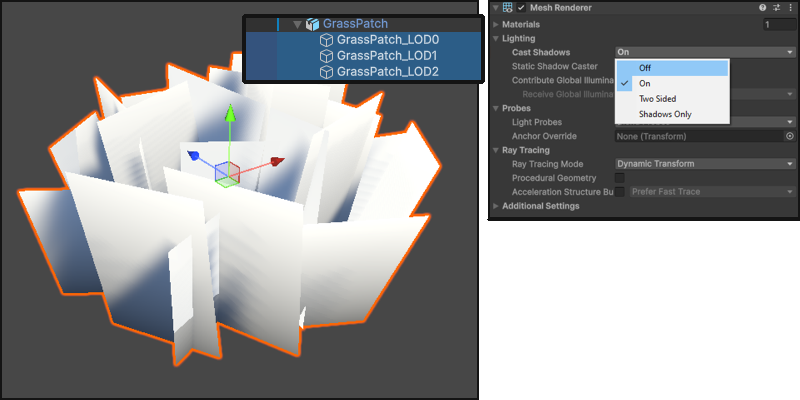
By default the Cast Shadows property is enabled, allowing the grass to cast shadows in the scene.
Note: This might be heavy on performance!
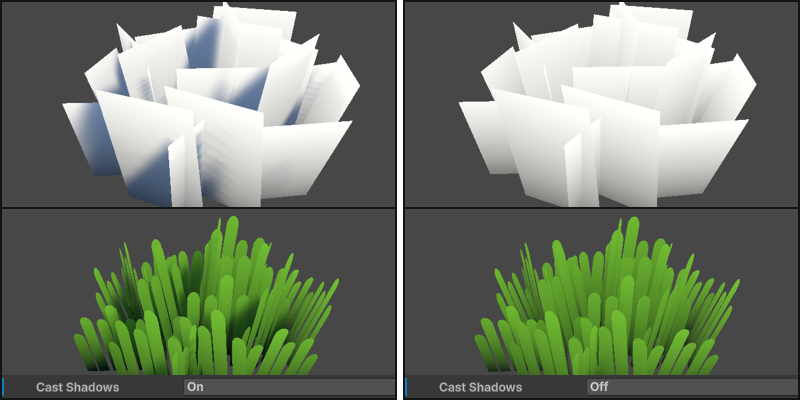
You should look into disabling it for each of the LOD levels, or any renderers if using a custom mesh.
Before setting up the shader, add the Grass Manager script to a new empty game object in your scene.
Without it, the grass shader will not function correctly. We will cover everything on Grass Manager later on after setting up the shader.
Grass Shader
Start by creating a new material in your project and assign the shader 4ydam/A+Grass to it. You can assign the material to your grass mesh. Just drag and drop it onto the mesh.
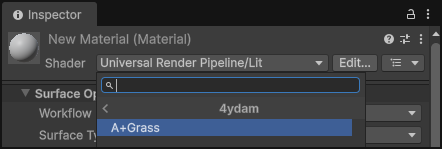
You can then customize the material properties to achieve the desired look for your grass.
Let's cover each property.
Texture Sample
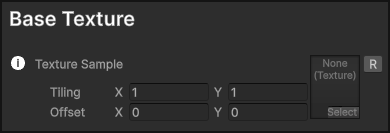
First thing, assign the texture of your choice on the Texture Sample property. This will be the texture that is rendered as grass in your scene. You can use any 2D texture, but for best results use a texture with an alpha channel.
Note: All of the variables have an [R] button which lets you reset them to their default values.
There is 5 sample sprites that come with the package, so feel free to use one of these to start with.
You can find them in 4ydam/A+Grass/Textures
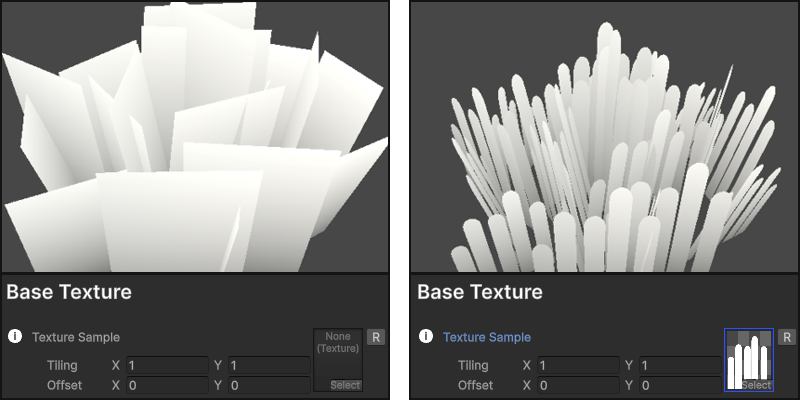
For this setup I will use the first one Sprite_Grass01 texture. (The grass sprites included in this package are using a resolution of 1024x1024 pixels)
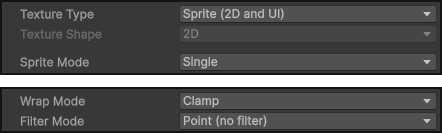
For best results, the texture you want to sample should be set as a Sprite in Texture Type. Set Wrap Mode to Clamp and Filter Mode to Point (no filter)
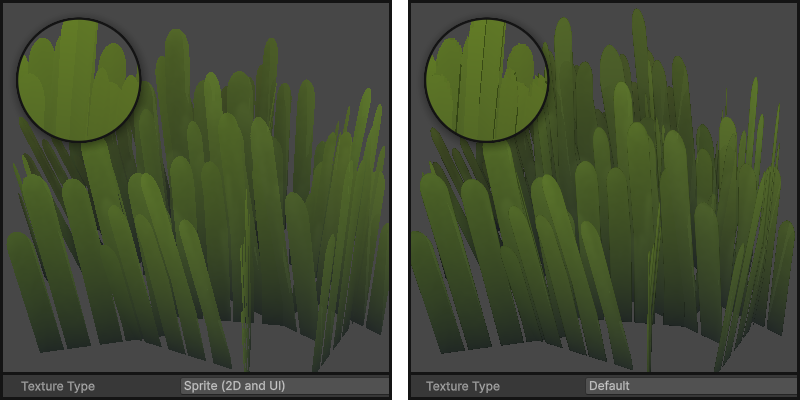
Sprite ensures that if there is a transparent area in the texture, it will be rendered correctly with an alpha channel. Default setting is usually fine, but it sets the alpha/transparency on the image to black, just like a .JPEG file would. So whilst it is still transparent on the mesh, you can see bleeding of the texture, creating black edges.
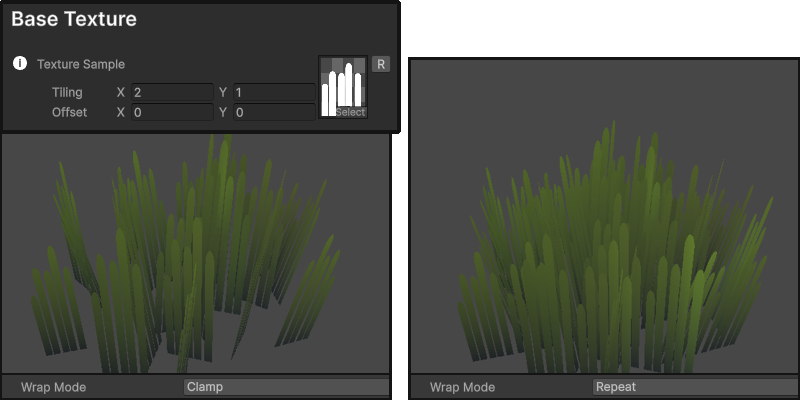
When you adjust Tiling on the X axis, you should consider setting Wrap Mode to Repeat on your texture sample. With that you will be able to tile the grass horizontally and have more, thinner blades. At a point they will be visibly stretched so adjust accordingly.
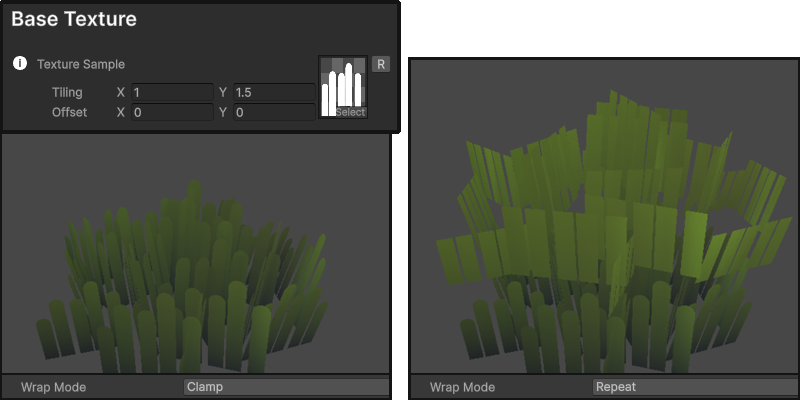
When adjusting Tiling on the Y axis, you might want to set Wrap Mode to Clamp on the texture sample. This will prevent the texture from repeating vertically, which can help maintain the appearance of shorter grass blades. It could however give interesting results if you experiment with different sprites, potentially one that repeats and goes all the way from bottom to the top.
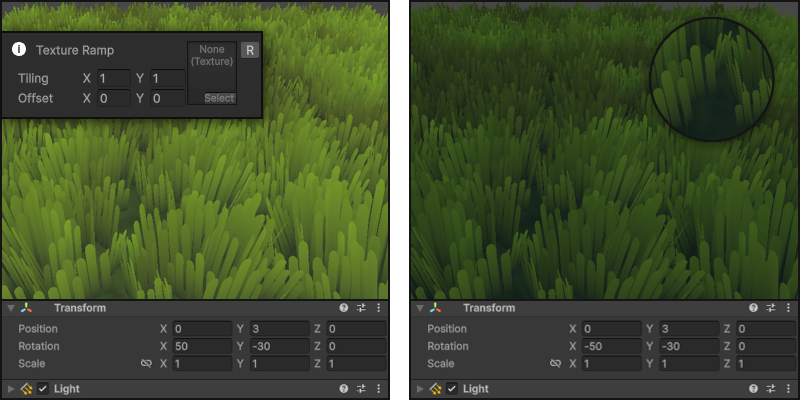
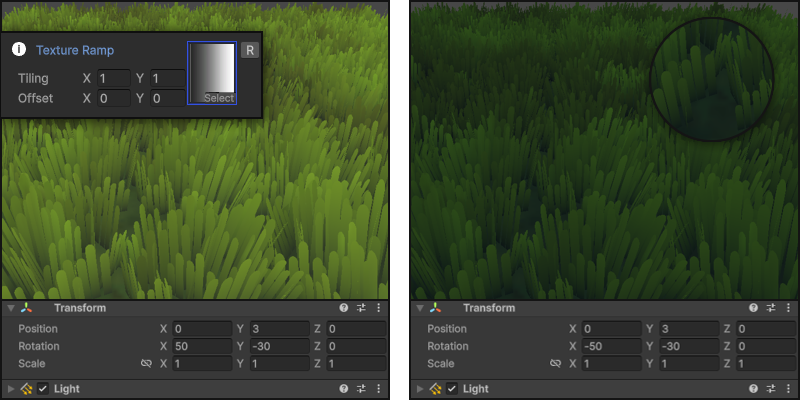
Texture Ramp
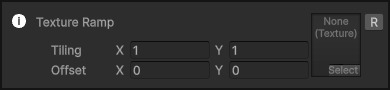
The Texture Ramp is used to control how the light affects the grass. Without one, the grass will be visibly brighter than other objects, specifically in a darker setting.
Colour
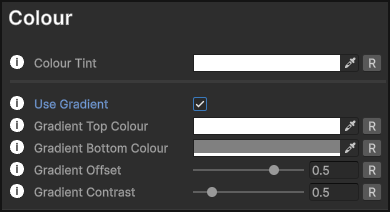
There is 2 ways of setting the colour of the grass. The base colour, and with use of the gradient.
1. Colour Tint which sets the base of the grass and will create one solid colour.
2. If you tick Use Gradient, the gradient options will appear, and overrride the base colour tint.
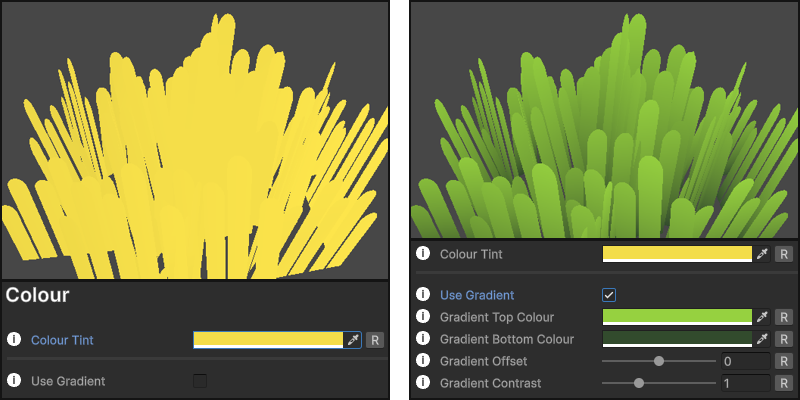
You can adjust the top and bottom colours of the gradient to achieve the desired look for your grass.
Gradient Offset allows you to shift the gradient up or down on the grass mesh, letting you to tune the visibility of the gradient. (changing position)
Gradient Contrast lets you to adjust the contrast of the gradient, sharpening or softening the transition between the top and bottom colours. (changing size)
Colour Variant
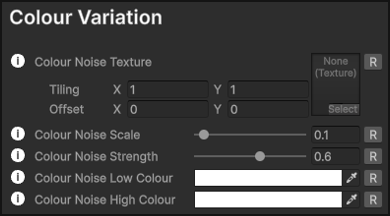
Setting up a variant adds diversity to the grass, which is especially effective in a field of grass. It uses a noise texture to create a variation in colour across the grass surface. You can use one of the provided noise textures, or create your own.
Colour Noise Texture lets you input the noise texture that will be applied to the grass.
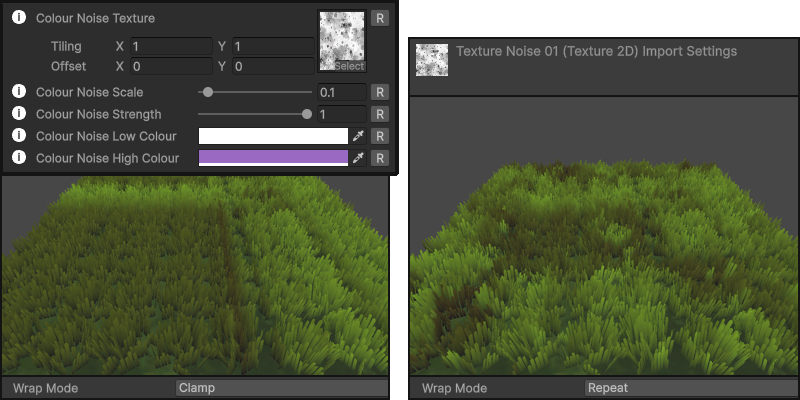
Make sure to set the sampled texture to Repeat! If you use your own noise texture, select it and set the Wrap Mode to Repeat. Otherwise it will not tile correctly.
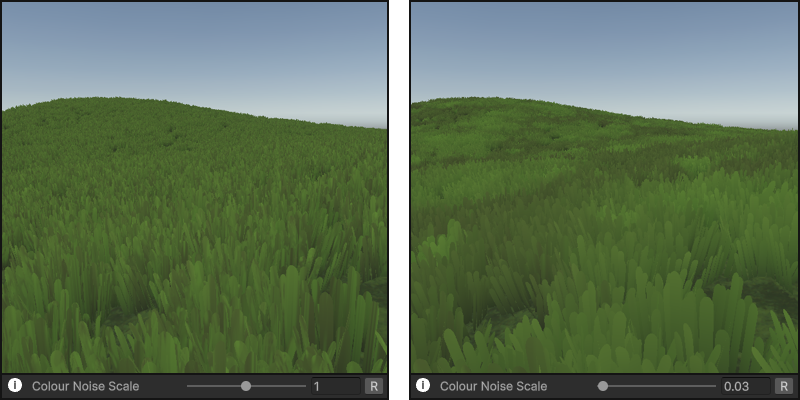
Colour Noise Scale lets you scale the noise texture. Lower values are recommended, as it results in larger and more noticable coverage.
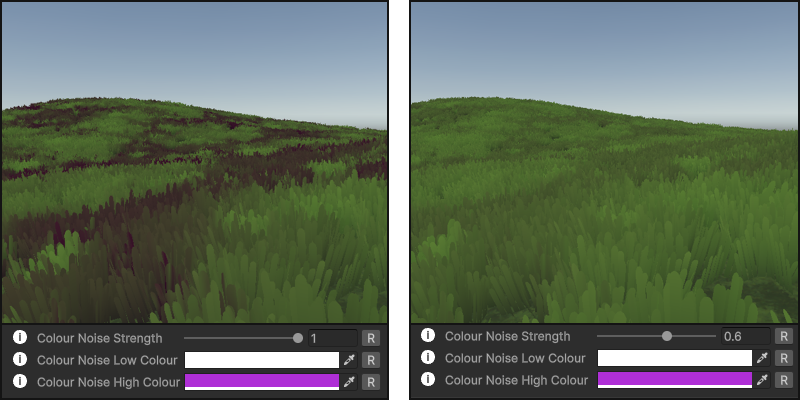
Colour Noise Strength will adjust the intensity of the colour variant.
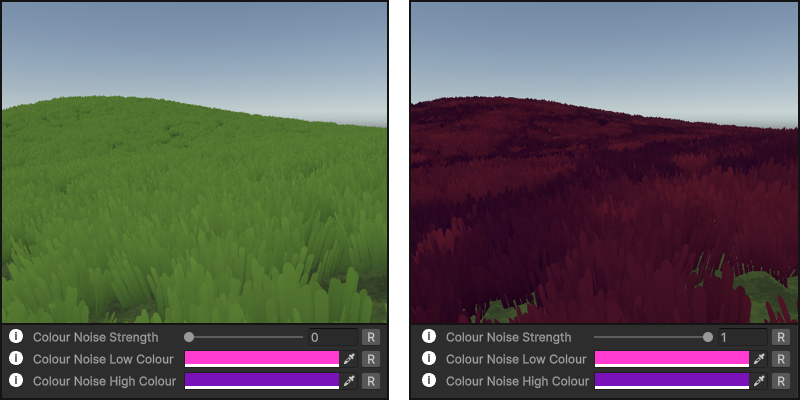
Color Noise provides an ability to change and ultimetly override the base as well as the gradient colours on the grass. Low Colour will affect dark areas, while High Colour affects light areas on the noise texture.
Interactivity
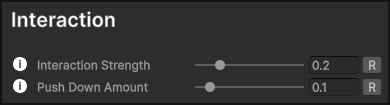
On the grass shader/material, you can adjust two parameters to control how the grass behaves when interacted with. Both should be adjusted alongside to get best results, and both values would be releatively low.
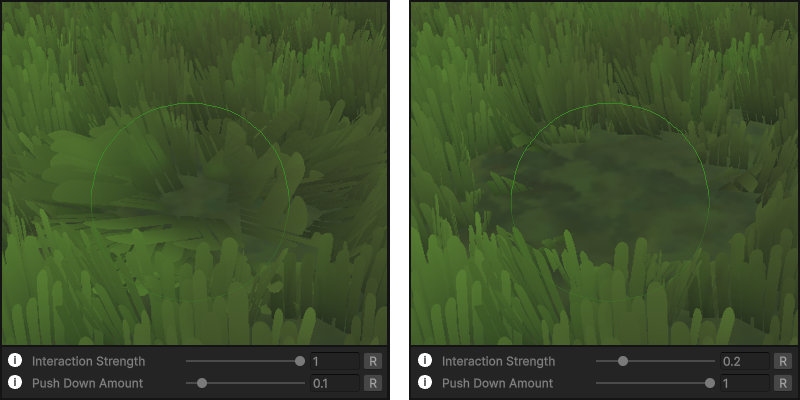
1. Interaction Strength controls how much the grass bends when interacted with.
2. Push Down Amount controls how much the grass is pushed down when interacted with. Note: For full interactive setup head to the Interactivity page in the documentation.
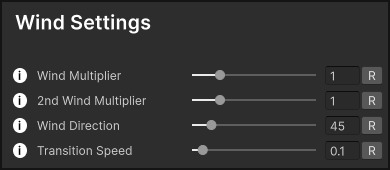
Wind
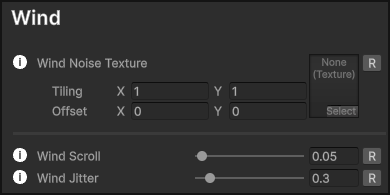
There are two wind noise textures that you can use to simulate a more dynamic wind effect on the grass. It works by blending the two noise textures and can be adjusted for one of them to be more dominant, or using only just one.
Wind Scroll Controls the speed of the noise texture and how strong the wind effect is.
Wind Jitter Adds randomness of the wind effect, adding variation to the movement, which can make it feel more natural.
2nd Wind
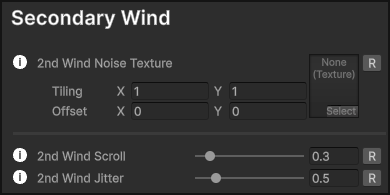
The second wind has the exact same setup as the first. However, it can be used as an additional layer to create a more fluid and dynamic effect.

Wind Blends
Use the Winds Blend slider to adjust the use of the two winds.
- At value of 0, only the first wind will be used.
- At value of 1, only the second wind will be used.
- At value of 0.5, both winds will be blended equally.
Perspective Correction

If you enable Perspective Correction, the grass will adjust its orientation based on the camera's perspective. This gives better results for a top-down game making the closer patches of grass look towards the camera.
Correction Strength Controls the strength of the perspective correction effect. At value of 0, the effect is disabled.
Correction Radius Controls the starting point of the perspective correction effect when viewed from a top-down angle. Adjusting how far the effect reaches.
Max Offset Controls the maximum offset applied by the perspective correction effect, limiting the strength of the correction.
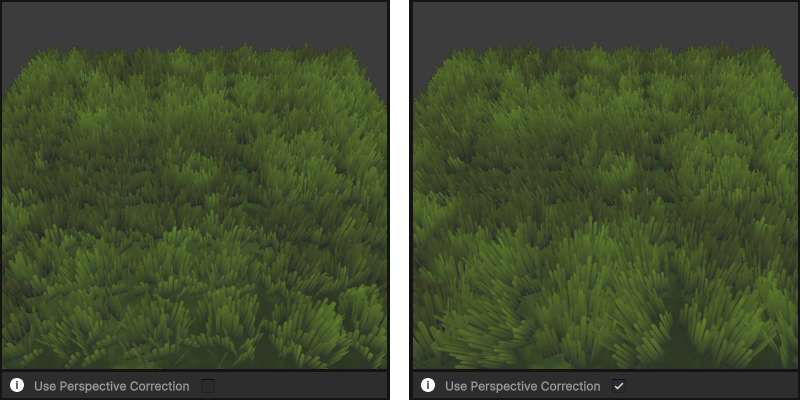
This helps fix the appearance of the grass from a top-down view, facing the camera, coming across as more dense with fewer empty spots.
Rendering
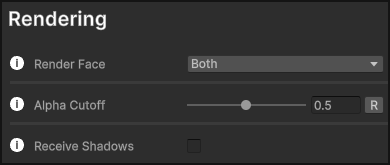
Render Face adjusts which side of the mesh get's rendered. By default in Unity it's Front, but in the A+ Grass shader by default it's set to Both. This ensures that all blades are visible from all angles. Depending on the setup of the mesh, if you use a custom one (especially for a top-down game) with a camera that doesn't rotate it would be setup to face one side, and you can change it to Front instead.
You can adjust the transparency with Alpha Cutoff and change the strength of the alpha. Value of 0 will have no transparency and anything above that will start applying it. Generally no need to adjust this.
Note: If you're using the 2022 version, set alpha cutoff to 1, otherwise you will see texture bleeding on your grass blades. (Inconsistent black outline)Receive Shadows lets the grass receive shadows from other objects in the scene. Important! This setting will do nothing if you have disabled Cast Shadows on the mesh in Mesh Renderer.
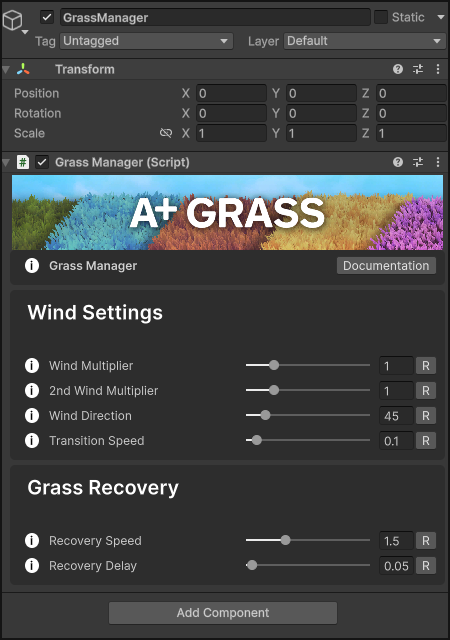
Grass Manager
The Grass Manager is responsible for managing all interactive grass elements in the scene. There is also global settings for the wind and recovery of the grass from interactions.
Wind Settings
Wind Settings let you adjust the wind dynamically at runtime for a real weather effect.
Wind Multipliers let you control the speed of both winds setup within the material, working as a global override for all grass in the scene. Same goes for the Wind Direction overriding the direction of the wind in world space.
Both the multipliers and direction settings can be adjusted in real-time at runtime to create dynamic weather effects. They are set as public variables in the Grass Manager script, so you can access and reference them in your own scripts where you can handle the wind behavior dynamically.
Public Variables: globalWind1Multiplier globalWind2Multiplier globalWindDirection
Grass Recovery
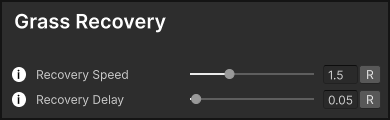
Grass Recovery settings allow you to control how the grass returns to its original state after being interacted with.
These settings are covered in the Interactivity section.
Grass Manager has a gizmos preview for the wind direction as well as the strength of both multipliers.
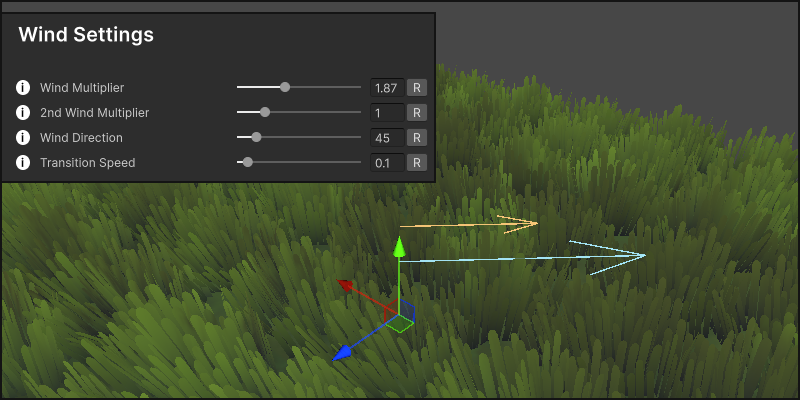
Blue represents the first wind and yellow second wind. The bigger the value, the longer the arrow.
That covers the material and setting up the mesh with the A+ Grass Shader!
If you want to make it interactive, you will need to add the Grass Manager and Grass Interactor scripts into your scene, which requires further setup and understanding of values in these scripts.
For that, head to the Interactivity page in the documentation, and get started with making your grass react to either the mouse or/and characters in the scene!
If you like the asset, please consider leaving a review on the Unity Asset Store!
Leave A Review